Today’s article is all about a delightful tutorial that will have you crafting your very own Aurora-inspired Disney princess bracelet. Created by TheNosyCat, this video guide takes you step-by-step through the process of making a beautiful bracelet that captures the essence of the beloved Disney princess.
In this tutorial, you’ll learn how to create a stunning accessory using seed beads and a touch of creativity. The video features a mesmerizing soundtrack by Jova Musique, adding an extra layer of magic to the experience. So, if you’re a fan of Disney princesses or simply love crafting, this tutorial is a must-watch. Get ready to embark on a fun and enchanting journey as you follow along with TheNosyCat’s instructions and create your very own Aurora-inspired bracelet. Let your inner princess shine as you bring this accessory to life and add a touch of Disney magic to your style. So, gather your materials and let’s get started on this delightful crafting adventure!
Materials Needed
To create your own Aurora-inspired Disney princess bracelet, you will need the following materials:
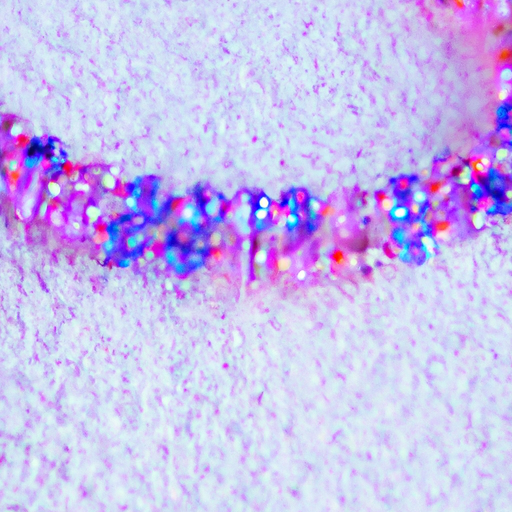
Seed beads in various colors
Seed beads are small, round beads that come in a wide range of colors. Choose seed bead colors that match Aurora’s signature colors, such as shades of pink, blue, and purple, to capture the essence of the princess.
Thread or jewelry wire
You will need a sturdy thread or jewelry wire to string the seed beads. Choose a thread or wire that is strong enough to hold the beads securely.
Needle or beading tool
To make it easier to string the seed beads, you will need a needle or a beading tool. The needle should be thin enough to fit through the holes of the seed beads.
Clasp or closure
To secure the bracelet around your wrist, you will need a clasp or closure. Choose a clasp that complements the style of the bracelet and ensures it stays securely in place.
Scissors
You will need a pair of scissors to trim any excess thread or wire once the bracelet is complete. Make sure the scissors are sharp and pointed for precision cutting.
Optional: charms or embellishments
If you want to add some extra flair to your bracelet, you can include charms or embellishments that represent Aurora or enhance the overall princess theme. Choose charms that are small enough to fit onto the bracelet and attach them with jump rings or small connectors.
Step 1: Gather the Materials
Before you begin creating your bracelet, make sure you have gathered all the necessary materials. Double-check that you have seed beads in the desired colors, the appropriate thread or jewelry wire, a needle or beading tool, a clasp or closure, and a pair of scissors. If you plan to add charms or embellishments, have those ready as well. Having everything prepared will make the crafting process smoother and more enjoyable.
Step 2: Prepare the Thread
Now that you have all your materials, it’s time to prepare the thread or jewelry wire for beading. Cut a length of thread or wire that is long enough to wrap around your wrist with some extra length for tying. This will ensure that the bracelet fits comfortably. If you’re using a needle, thread it onto one end of the thread. If you’re using a beading tool, attach one end of the thread to it. You are now ready to start beading!
Step 3: Start Beading
To begin beading, secure the thread with a knot or attach it to the beading tool. This will prevent the beads from sliding off as you work. Start by stringing the seed beads in the desired pattern. You can choose to use Aurora’s signature colors or create your own unique design. Experiment with different bead combinations and arrangements to capture the essence of the princess.
Continue adding seed beads until the bracelet reaches the desired length. Remember to leave some extra length at the end for attaching the clasp. You can adjust the length as you go by trying on the bracelet and seeing how it fits around your wrist.
Step 4: Add Charms (Optional)
If you want to add some extra charm to your bracelet, consider including charms or embellishments that represent Aurora or enhance the overall princess theme. Look for charms in the shape of crowns, fairies, or Aurora’s spinning wheel. Ensure that the charms are small enough to fit onto the bracelet and that they can be attached using jump rings or small connectors. Add the charms between the seed beads, spacing them evenly or placing them in specific spots to create a focal point.
Step 5: Secure the Bracelet
Once you have finished beading and, if desired, adding charms or embellishments, it’s time to secure the bracelet. Choose a clasp or closure that complements the style of the bracelet and ensures it stays securely on your wrist. There are various types of clasps to choose from, including lobster clasps, toggle clasps, and magnetic clasps. Attach one end of the clasp to the end of the bracelet and the other end to the extra length of thread or wire. Make sure the clasp is secure and will not easily come undone.
Step 6: Trim Excess Thread
After securing the bracelet, take a pair of scissors and carefully trim any excess thread or wire. Be cautious not to cut the wrong thread and undo your hard work. Leave a small tail at the end for added security, as this will prevent the bracelet from unraveling. Make sure that the trimmed ends are not visible when wearing the bracelet, as this will give it a polished and finished look.
Step 7: Test the Bracelet
Now that your Aurora-inspired bracelet is complete, it’s time to test it out. Put the bracelet on and adjust the fit if needed. Ensure that the bracelet is comfortable to wear and does not slip off easily. Pay attention to the security of the beads and charms, making sure they are not likely to come loose with movement. With a well-fitted and secure bracelet, you can confidently showcase your creation.
Step 8: Style and Wear
Now that you have your Aurora-inspired bracelet, it’s time to style and wear it. Pair it with your favorite outfits, whether they’re casual or dressy. Consider wearing the bracelet alongside other Disney princess-themed jewelry to complete the enchanted look. Whether you’re going to a themed event, a Disney park, or simply want to add some princess magic to your everyday life, this bracelet will make you feel like royalty.
Conclusion
Creating an Aurora-inspired Disney princess bracelet is a creative and fun way to showcase your love for the character and Disney princesses in general. By following this tutorial, anyone can create their own unique piece of jewelry that captures the essence of Aurora. Experiment with different bead colors and patterns, add charms that represent the princess, and enjoy the process of bringing your own vision to life. Remember to have fun and let your creativity shine while making the bracelet. With your Aurora-inspired bracelet, you can proudly wear a symbol of your admiration for princesses and the magical world of Disney.