Want to create your own dazzling bracelet inspired by the enchanting world of Disney princesses? Well, you’re in luck because this article is here to guide you through the process of making a beautiful Jasmine-inspired bracelet. In this latest installment of our Disney Princess DIY series, we will be focusing on the lovely and adventurous princess from the classic tale, Aladdin. With the help of TheNosyCat’s insightful video, we’ll explore the step-by-step instructions on how to bring a touch of magic into your accessories collection. So get ready to unleash your creativity and show off your love for Disney with this fun and trendy DIY project.
This tutorial will make use of seed beads in vibrant colors that capture the essence of Jasmine’s vibrant personality. Whether you’re a seasoned jewelry maker or a complete beginner, this project is perfect for everyone! You’ll learn how to create intricate patterns using seed beads and master the art of weaving them seamlessly into a stunning bracelet. So gather your crafting supplies and prepare for a creative adventure as we dive into the world of Disney princess-inspired DIY bracelets. Get ready to channel your inner Jasmine and create a piece of jewelry that is fit for royalty!
I. Materials Needed
To create your own Jasmine-inspired bracelet, you will need a few essential materials. Here’s a list of what you’ll need:
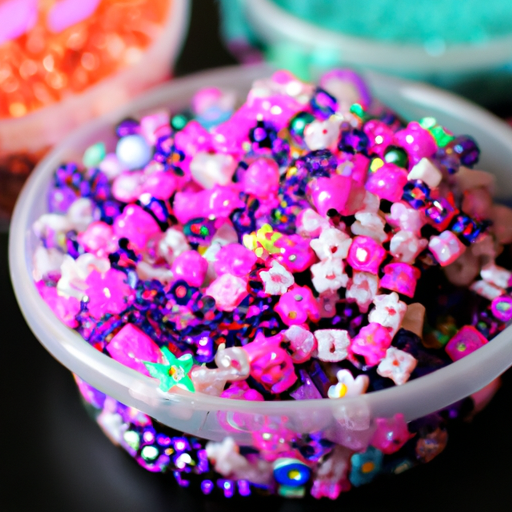
A. Seed beads
Seed beads will be the main component of your bracelet. They come in various colors and sizes, so make sure to choose the ones that best match your vision for the bracelet.
B. Jewelry wire
Jewelry wire is crucial for stringing the beads together and creating the bracelet’s structure. Opt for a wire with an appropriate thickness for your chosen seed beads.
C. Crimp beads
Crimp beads are necessary for securing the ends of the wire and preventing the beads from sliding off. They are small metal beads that can be crimped using pliers.
D. Lobster clasp
A lobster clasp is a key component in creating a functional closure for your bracelet. It allows you to easily fasten and unfasten the bracelet.
E. Jump rings
Jump rings are circular metal connectors that will be used to attach the lobster clasp to the bracelet. Make sure to choose durable jump rings that will securely hold the clasp in place.
F. Pliers
Pliers are a must-have tool for any jewelry-making project. They will be used for various tasks such as opening jump rings and crimping beads.
G. Scissors
Scissors will come in handy for cutting the jewelry wire to the desired length. Make sure to use sharp scissors that can cleanly cut through the wire.
H. Beading needle
A beading needle is optional but can be helpful for threading the wire through the small seed beads. It has a thin, flexible tip that makes it easier to manipulate the thread.
II. Choosing the Color Scheme
Before diving into the bracelet-making process, it’s essential to choose the right color scheme. In the case of a Jasmine-inspired bracelet, you have a few options:
A. Jasmine’s color palette
Jasmine is often associated with shades of turquoise, teal, and gold. These colors reflect her vibrant personality and the luxurious atmosphere of her palace. Consider incorporating these colors into your bracelet to capture the essence of Jasmine.
B. Other complementary colors
If you’d like to add some variety to your bracelet, you can explore complementary colors that would accentuate the Jasmine theme. For example, shades of purple or royal blue can complement the turquoise and create an eye-catching combination.
III. Designing the Bracelet Pattern
Now that you have your materials ready and a color scheme in mind, it’s time to design the pattern for your bracelet. Here’s a step-by-step process:
A. Sketching the pattern
Grab a piece of paper and sketch out a rough design for your bracelet. Consider the arrangement of beads, any additional accents, and the overall structure. This will serve as your visual guide throughout the bracelet-making process.
B. Selecting the bead arrangement
Take a look at your sketch and decide on the specific arrangement of the seed beads. You can opt for a uniform pattern, alternating colors, or even create a gradient effect. Play around with different arrangements until you find one that you love.
IV. Preparing the Jewelry Wire
Before you can start stringing the beads, you need to prepare the jewelry wire. Follow these steps:
A. Measuring the desired length
Decide on the desired length of your bracelet and measure the jewelry wire accordingly. It’s always better to cut a longer piece of wire and trim it later if needed.
B. Cutting the wire
Once you have measured the desired length, use a pair of sharp scissors to cut the jewelry wire. Make sure to cut it cleanly and avoid any frayed edges.
C. Attaching a crimp bead and lobster clasp
Slide a crimp bead onto one end of the wire, followed by one end of the lobster clasp. Loop the wire back through the crimp bead, creating a small loop around the lobster clasp. Use your pliers to flatten the crimp bead, securing the lobster clasp in place. This will create one end of your bracelet.
V. Stringing the Beads
With the wire prepared, it’s time to start stringing the seed beads onto the wire. Follow these steps:
A. Threading the wire through the beading needle
If you’re using a beading needle, thread the wire through its eye. This will make it easier to maneuver the wire through the small seed beads. Make sure the wire is securely threaded through the needle.
B. Adding the seed beads in the chosen pattern
Start adding the seed beads onto the wire, following your chosen pattern. Take your time and make sure each bead is securely in place. Continue adding beads until you reach your desired length or until you’ve used all the beads.
Remember to periodically refer back to your sketch to ensure you’re staying on track with your design.
VI. Attaching the Jump Rings
Once you have finished stringing all the beads, it’s time to attach the jump rings and create the closure for your bracelet. Follow these steps:
A. Choosing the appropriate size of jump rings
Consider the size of your lobster clasp and select jump rings that are large enough for the clasp to pass through. Make sure the jump rings are sturdy and will withstand the everyday wear of the bracelet.
B. Opening the jump rings with pliers
Using your pliers, gently open the jump rings by twisting them sideways. Avoid pulling them apart, as this may weaken the metal. Open the jump rings just enough to slide the lobster clasp through.
C. Attaching the jump rings to the bracelet ends
Slide one end of the bracelet, the one without the lobster clasp, onto the opened jump ring. Close the jump ring by twisting it back into place. Repeat the process for the other end of the bracelet, ensuring that the lobster clasp is securely attached.
VII. Adding Final Details
Once the basic structure of the bracelet is complete, you can add some final details to enhance its appearance. Consider the following options:
A. Embellishing with additional beads or charms
If you want to add some visual interest to your bracelet, consider adding a few extra beads or charms. Choose elements that complement the overall design and make the bracelet even more unique.
B. Securing the beads with crimp beads or knots
To ensure that the beads stay in place, you can use crimp beads or knots to secure them. Place a crimp bead at each end of the beaded section and use pliers to flatten them. Alternatively, you can tie a knot at each end of the beaded section, ensuring it is tight and secure.
VIII. Finishing Touches
With the bracelet almost complete, it’s time to add the finishing touches and make any necessary adjustments. Follow these steps:
A. Trimming excess wire
Carefully inspect the bracelet and trim any excess wire that may be sticking out. Using sharp scissors, cut the wire close to the crimp beads or knots, ensuring a neat and tidy finish.
B. Checking bracelet for symmetry
Before finalizing the bracelet, take a moment to check its symmetry. Make sure the bead arrangement is evenly spaced, and the jump rings sit symmetrically on each side. This attention to detail will enhance the overall appearance of the bracelet.
IX. Cleaning and Polishing
To ensure your bracelet looks its best, a final cleaning and polishing step is essential. Follow these steps:
A. Removing any fingerprints or dirt
Wipe down the entire bracelet with a soft cloth to remove any fingerprints or dirt that may have accumulated during the creation process. This will give the bracelet a clean and polished look.
B. Polishing the beads for a sparkling finish
If your seed beads appear dull or lackluster, you can polish them using a jewelry polishing cloth or a mild solution of water and gentle soap. Gently rub the beads to restore their natural shine, giving your bracelet a sparkling finish.
X. Conclusion
Congratulations! You have successfully created your own Jasmine-inspired bracelet. By following this comprehensive guide, you were able to choose the right materials, design a unique pattern, and assemble the bracelet with care. Whether you wear it yourself or gift it to a loved one, your bracelet is sure to be a beautiful reminder of Jasmine’s magical world. Enjoy your newfound jewelry-making skills and continue exploring different designs and color schemes to create more stunning bracelets in the future!